

Season 2 Battle Pass Skins
| Chapter 2 Season 2 Battle Pass | |
|---|---|
 | |
| Details | |
| Rarity | Mythic |
| Cost | 950 |
| Release Date | |
| (UTC-) | Feb xx, 2020 The in-game shop updates at 00:00 UTC daily, which means that the eastern and western halves of the world are on different dates when the shop updates. This UTC- date applies to Northward and South America and French Polynesia. Date incorrect? Please edit this page. For more than info come across Help:Dates. |
| (UTC+) | Feb 21, 2020 The in-game store updates at 00:00 UTC daily, which means that the eastern and western halves of the world are on different dates when the shop updates. This UTC+ engagement applies to Europe, Africa, Asia, and Oceania/Australia. Date incorrect? Please edit this page. For more info see Help:Dates. |
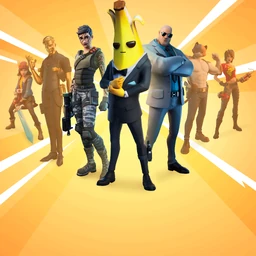
Affiliate 2 Flavour two is the 2d flavour of Chapter 2, and the 12th season of the game Fortnite Boxing Royale. It is a 100-level battle laissez passer containing over 100 cosmetic items, which is 950 5-Bucks, or 2800 Five-Bucks if the Boxing Package is bought, rewarding the first 25 levels.
The Battle Laissez passer for Chapter 2 Season 2 ran from February 20th, 2020 until June 17th, 2020. Currently, you tin can no longer earn any rewards/complete challenges from Chapter ii Season two as that flavour has ended.
Contents
- one Battle Laissez passer
- ii Battle Pass Tab
- ii.1 Claiming Table
- ii.i.i Challenges
- 2.2 Daily Consignment
- 2.2.one Bears Vs Gnomes
- ii.3 Agents
- ii.3.1 Brutus
- ii.3.2 TNTina
- 2.3.3 Meowscles
- 2.3.4 Skye
- 2.3.5 Midas
- two.4 Upgrade Vault
- two.iv.1 Style and Choices
- 2.4.one.1 Hairstyle
- 2.iv.1.2 Tatoos
- 2.4.1.iii Sleeves
- ii.4.1.4 Boots
- 2.iv.one.5 Shirt Colors
- two.4.ane.six Belong
- 2.iv.ane.7 Helmet
- 2.4.one.8 Pants Color
- 2.iv.1.9 Face Paint
- 2.4.1.ten Scarf
- two.iv.1 Style and Choices
- 2.5 ?
- 2.6 Spy Games
- 2.half dozen.1 SHADOW Tech
- 2.6.ii GHOST Tech
- ii.1 Claiming Table
- 3 Gallery
Battle Pass
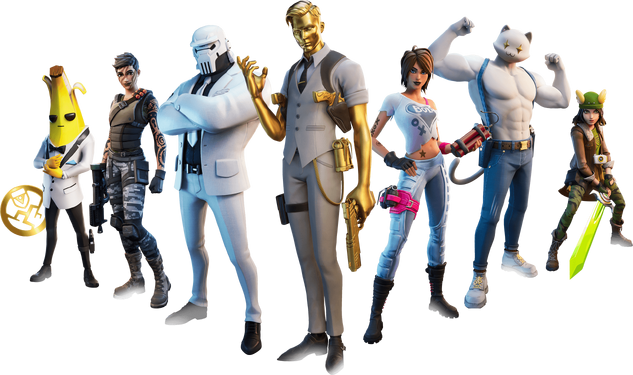
The Battle Pass section features the by and large normal part of the Battle Pass Tab, the rewards to be collected during the season. Upon purchasing the Boxing Laissez passer, Legendary Gear Specialist Maya and Epic Agent Peely are automatically rewarded. Epic Brutus is also automatically rewarded upon purchasing the Battle Bundle. The level 100 skin for this season is Legendary Midas. Well-nigh outfits have a bonus feature that makes them unique from the residual.
Six out of 7 outfits included in the Battle Pass accept a selectable fashion that transforms them into solid gilded, known as "Golden Amanuensis". This includes the following outfits:
- Epic Agent Peely
- Epic Brutus
- Epic TNTina
- Epic Meowscles
- Epic Skye
- Legendary Midas
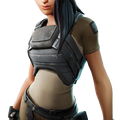
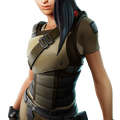
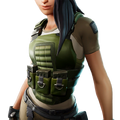
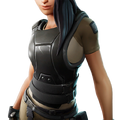
The remaining outfit, Legendary Gear Specialist Maya, is the kickoff outfit able to exist fully customized, with iii.8 million different combinations. The outfit is the introduction to "Forged" outfits.
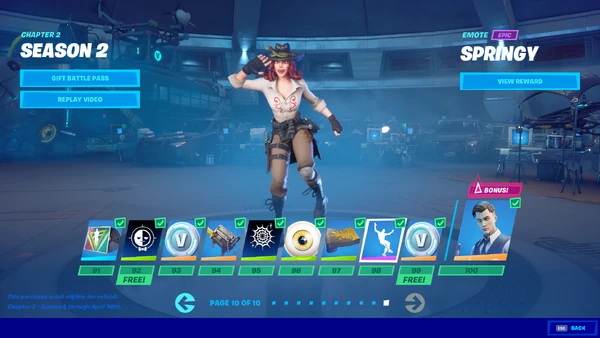
Similar to last flavor, the leveling system allows you lot to attain beyond tier 100, with additional 'gilded' styles for the Battle Laissez passer skins being rewarded for reaching a sure amount past 100.
Boxing Laissez passer Tab


Without Doomsday Device Cables
In Chapter 2 Flavour 2, the Battle Pass tab has been changed into a large, interactive carte with multiple sublocations, including the Battle Pass rewards and Challenges. The location can be called HQ, a location for almost of the Battle Pass skins to hang around at during all of the flavor. Also included in this area is Deadpool's hideout, which can be accessed through the vents.
Challenge Table

The Challenge Table is a tabular array that the Battle Pass skins surround in HQ. The Challenge Table shows a list of all the challenges that need to be completed. The list includes manner challenges, unique challenges for skins or other cosmetics, and daily challenges. The Challenge table too includes a map, where a challenge is placed in the destination it is completed in, unless it is a challenge that can be completed anywhere.
Challenges
- Maya's Challenges
- Deadpool's Weekly Challenges
- Brutus' Briefing
- TNTina'due south Trial
- Meowscles' Mischief
- Skye'south Take chances
- Midas' Mission
- Spy Games
- Location Domination
- Awaken Oro (until April 1st)
- Travis Scott's Astronomical Challenges (until Apr 22nd)
Daily Assignment

The Daily Consignment section is a lath that is simply for Daily Challenges. Daily Challenges are challenges that are rewarded every day. Up to three challenges can be held, and a challenge can also be replaced once a twenty-four hour period with another claiming. Daily Challenges generally consist of simple tasks such every bit searching chests or ammo boxes in a specific location or harvesting a sure amount of fabric.
Bears Vs Gnomes
On March 31 (Patch 12.xxx), the images of random weapons on the Daily Consignment Board were taken down, and instead, an paradigm of bear and a gnome appeared along with an epitome of a basement hatch. It is the hatch of the northwest motel of Weeping Woods, which when a player enters is really a secret hideout for a group of toy bears holding a gnome in a prison cell. Normally when players would enter the area, nothing would occur. Past March 31, players tin can at present enter the surface area, which would complete a clandestine challenge: Finding the Ted Offensive Plans.
One time the Ted Offensive Plans are found, the second image on the Daily Assignment Board would be replaced with the image of the Bears in the hideout, where the plans are found. Five new images would besides be put upward, and pins would connect each motion-picture show to a point of the Battle Royale Map on the board. These are actually locations where Honey tin can be found and interacted with. The locations are north of Pleasant Park, The Orchard, southwest of the Green Steel Span, northeast of the Ghost Firm, and in between Sweaty Sands and Holly Hedges, all under tree locations. The locations can be indicated with the audio of bees. The Honey also slowly heals 10 health or shield. xl,000XP volition be rewarded for completing the challenge.
One time the Ted Offensive Plans are plant, another challenge will be available, nevertheless won't be shown on the Daily Assignment Lath. In one case the other two challenges are complete, all the images will be removed from the board, leaving simply the map and the Daily Challenges department. Outside the cabin where the secret carry hideout is, five gnome outposts have appeared that players tin can locate. These locations are generally in a circle around the cabin, two of them being across the nearby river. The locations can also exist indicated with the audio of bees. Players must interact with five telescopes to aim them to the cabin to consummate the challenge. 40,000XP volition also be rewarded for this claiming. These challenges propose a battle will shortly begin or happen, the gnomes goal most likely to free the trapped gnome in the cabin.
On Apr 15th (Patch 12.twoscore), the Bears Vs Gnomes story connected farther. Dorsum at the motel, the gnomes have attacked, and take blown their way into the cabin. However one gnome was seemingly defeated from breaking in, the others have successfully captured the bears and saved their trapped gnome. Unfortunately, the first few challenges earlier the update are at present over, the telescopes and honey around the map vanishing. However, a new challenge has appeared, and can be completed past reentering the motel and interacting with a seemingly defeated bear in the muzzle. One time washed, all the bears will vanish from the cabin, liberating the bears. 15,000XP.
On April 29th (Patch 12.l), the Bears Vs Gnomes story connected even further. Most of the gnomes have left the motel they took over, and have begun to prepare for battle to the northeast of Weeping Woods with a large group of bears. Similar to the first set up of challenges, the challenge to free the bears is no longer available, just notwithstanding a new claiming is available. If a role player visits in game, the histrion can collaborate with both sides, disarming them both. Upon completion, all the of the weapons vanish, and the player is rewarded with 15,000XP and an Achievement, No Correct to Bear Arms.
On May 20th (Patch 12.60), the Bears Vs Gnomes story seems to take finished, catastrophe with all the gnomes and bears making a truce over a few drinks and a new set up of notes to follow. Any past challenges are no longer available, as the bears accept moved position and are no longer in the same situation. Withal, seemingly i concluding challenge has get bachelor. If a player visits in game, the thespian can emote in front end of the group. Upon completion, the player is rewarded with 15,000XP and another Achievement, Gnome More than War.
Agents
The Agents section is a section where five out of the seven Boxing Pass skins are introduced to their own style room in the HQ. This is as well where the pick for the skins to modify to either Ghost or Shadow is given. Based on which style is chosen the nigh, it tin bargain a massive outcome to the Battle Royale Map. For case, most players chose the Shadow style for TNTina, which led to The Rig being badly damaged and now taken over by Shadow.
Five out of 7 skins included in the Battle Laissez passer have 2 styles that are able to exist permanently selected betwixt; Shadow and Ghost. This includes the following skins:
- Epic Brutus
- Epic TNTina
- Ballsy Meowscles
- Epic Skye
- Legendary Midas
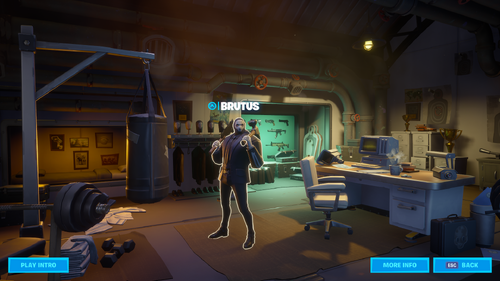
Brutus' Room
Brutus
Brutus' room was the first room to open during Chapter 2 Flavour 2, on the first day. The intro to Brutus' room shows Brutus entering his room, placing down a suitcase featuring his skull symbol, sitting downwardly in forepart of a desk, placing his hammer on the desk, and begins typing, finishing off with throwing his cleaver at the target placed on the door. At that place are 3 objects in the room that can exist interacted with:
- Brutus; Interacting with Brutus allows players to a set of terminal missions for Brutus' Briefing, giving the choice to unlock either a Ghost or Shadow variant. Quondam during the season, if one of the unique variants for Brutus was unlocked, the intro for Brutus would change to the unlocked style. Still, in that location are some camera problems with the ghost variant. This is the only intro to practice this.
- Target Canvas; Interacting with the target on the wall activates a cleaver to be shot across the room and hitting the target.
- Valves; Four ready of valves tin can be interacted with on pipes along the dorsum wall. Originally, simply one valve could be interacted with. Once interacted with three times, it would shoot gas out. Instead, all iv pipes must exist interacted with in a certain order (far correct, far left, top middle, far bottom) and all valves would shoot gas and activate Agent Peely to announced, completing a challenge for Amanuensis Peely'southward Spy License.
- Chimichanga; Interacting with the chimichanga (which appeared on the second week) simply removes it from the room permanently to complete Deadpool's Weekly Challenges.
- Marker; Interacting with the marker (which became interacting on the 6th calendar week) also removes information technology to consummate Deadpool's Weekly Challenges.
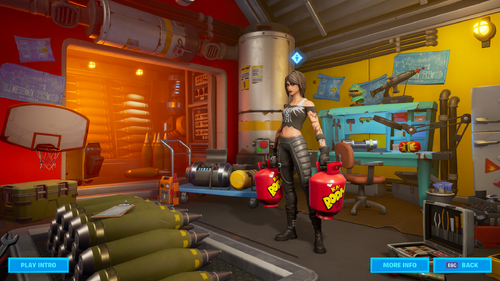
TnTina's Room
TNTina
TNTina's room was the 2nd room to open during Chapter 2 Season 2, on the third week. The intro to TNTina's room shows TNTina juggling grenades. She tosses the iii grenades into a chest backside her, pulling the pin for each 1 every throw. It finishes with TNTina kicking off the desk-bound she'south at and knocking the chest closed with her feet, bravado the inside of the chest for the end. In that location are three objects that tin be interacted with:
- TNTina; Interacting with TNTina allows players to a prepare of terminal missions for TNTina'south Trial, giving the choice to unlock either a Ghost or Shadow variant.
- Moisty Merman Head; Interacting with the Moisty Merman head in the room simply knocks the head back and forth, like a bobblehead.
- Machine; Interacting with the machin in the back of the room iii times turns the knobs on the machine, eventually causing an explosion. Upon causing the explosion, Peely as a Smoothie will appear from the fridge. However, this does not complete a challenge for Agent Peely'due south Spy License.
- Toilet Plunger; Interacting with the toilet plunger in TNTina's room simply removes it from the room permanently to complete Deadpool's Weekly Challenges.
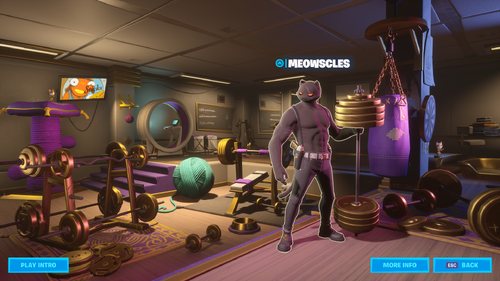
Meowscles' Room
Meowscles
Meowscles' room was the third room to open up during Chapter 2 Season ii, on the fifth week. The intro to Meowscles' room shows Meowscles working out with multiple weights, a treadmill. Instead of finishing on the bench press, information technology finishes with Meowscles leaving the litter box. There are 4 objects to collaborate with:
- Meowscles; Interacting with Meowscles allows players to a set of concluding missions for Meowscles' Mischief, giving the choice to unlock either a Ghost or Shadow variant.
- Speed Pocketbook; Interacting with the yarn speed handbag just hits the speed bag, knocking it effectually before going back into place.
- Dart Board; The final interacting object to be added to the room, the sprint board when interacted with sends up to iii darts into the board.
- Cat Toy; Interacting with the cat toy pushes the cat toy back. When interacted with four times, the cat toy will fall off the scratching post, and cause Agent Peely to appear, completing a challenge to Agent Peely's Spy License.
- Llama; Interacting with the llama in Meowscles' room simply removes it from the room permanently to complete Deadpool's Weekly Challenges.
- Pistol; Interacting with the pistol in Meowscles' room (which appeared on the eighth calendar week) simply removes information technology from the room permanently to complete Deadpool'south Weekly Challenges.
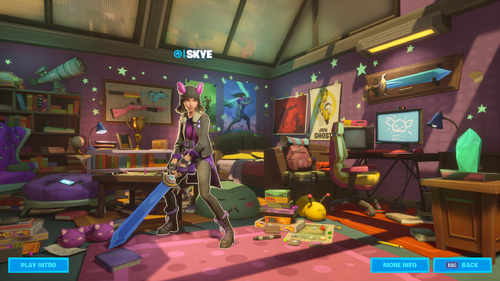
Skye's Room
Skye
Skye's room was the fourth room to open upward during Chapter two Season 2, on the 7th week. The intro Skye'southward room shows Meowscles and Skye playing with a tower of blocks. With a lilliputian help from Ollie, Skye wins the game, and takes a moving picture of Meowscles throwing the table in rage. At that place are three objects to collaborate with:
- Skye; Interacting with Skye allows players to a set up of final missions for Skye'south Adventure, giving the choice to unlock either a Ghost or Shadow variant.
- Lath Game; Interacting with the board game rolls a red dice, and moves a green piece beyond the board, earlier shortly resetting.
- Stars; Four stars tin be interacted with on the wall of Skye's room. When the stars are interacted with in a sure order (Far right, next to final, Far left, 2d to left), all the stars on the wall begin to glow for a limited time.
- Floaty: Interacting with the floaty in Skye's room (which appeared in week 9) simply removes information technology from the room permanently to complete Deadpool's Weekly Challenges.
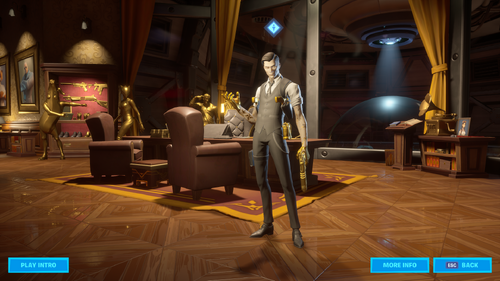
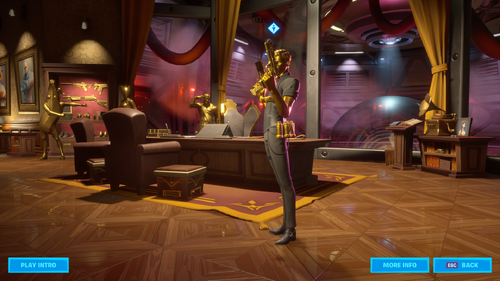
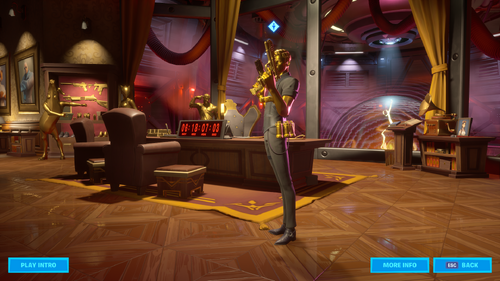
Midas' Room
Midas
Midas' room was the fifth and concluding room to open up, on the ninth calendar week. The intro to Midas' room shows Midas walking into his room belongings the helmet to the Black Knight. Midas uses his gilded impact to plow it to golden, and place it with his collection of gilt heads and helmets, featuring Lynx, Exhaustion, Aeronaut, Battle Hound, A.I.M., Large Chuggus, Astro Assassin, 8-Ball, Beef Dominate, Tall Ace, Chaos Agent, Tomatohead, and Beastmode. At that place are ii objects to interact with:
- Midas; Interacting with Midas allows players to a set of final missions for Midas' Mission, giving the option to unlock either a Ghost or Shadow variant.
- Phonograph; Interacting with the phonograph in the back of the room cracks the phonograph, and lets it play the Spies! music rail. Upon playing the music, Agent Peely appears behind the Brutus painting in the back hallway, completing a challenge for Agent Peely's Spy License.
- Shorts; Interacting with the shorts in Midas' room (which appeared in week ten) simply removes it from the room permanenetly to complete Deadpool's Weekly Challenges.
Midas' Room with Activated Doomsday Device
In Midas' room, a device known equally the Doomsday Device can be slightly seen in the dorsum of the room. The device's use is currently unknown, yet is rumored to utilise the power of the tempest and the Gilded Scepter, a harvesting tool that belonged to Oro to do something in an upcoming event. During the terminal few weeks of Chapter ii Flavor 2, wires were placed around the HQ, and even the Play tab of the entrance hall, eventually to plough on and begin activating the Doomsday Device. Somewhen, a timer appeared in both the Play tab of the entrance hall and Midas' room set to attain 0 on May 30th at 2:00PM EST, nearly probable the fourth dimension of the event.
Midas' Room with countdown for Doomsday Event and more active Doomsday Device
Upgrade Vault
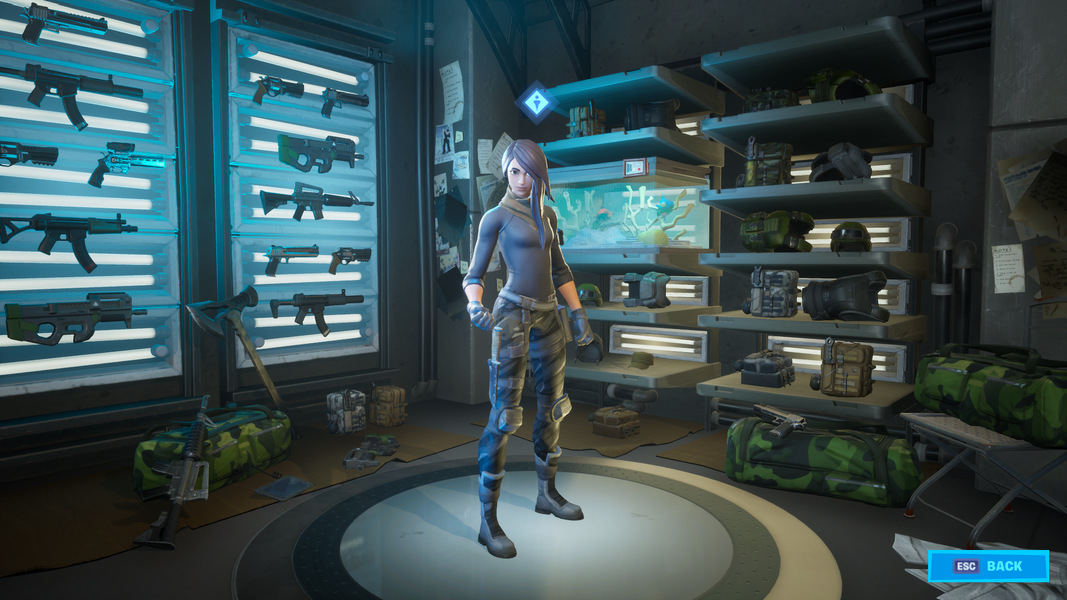
The Upgrade Vault section is the section of which Gear Specialist Maya can be upgraded and customized to a player'southward selection. The choices consists of up to ten different parts of Maya that can be changed. In order to have a gamble to selection the choices, Maya'south Challenges must be completed. A challenge becomes bachelor weekly, and can be completed to unlock a choice. Withal, one time players choose a way for Maya, that manner cannot exist inverse dorsum, and as well cannot change to anything else. The option is permanent.
Style and Choices
Hairstyle
| Default | |
|---|---|
 | |
| Requirement | |
| Maya's Challenges |
| Bob | |
|---|---|
 | |
| Requirement | |
| Maya's Challenges |
| Ponytail | |
|---|---|
 | |
| Requirement | |
| Maya's Challenges |
| Pixie | |
|---|---|
 | |
| Requirement | |
| Maya's Challenges |
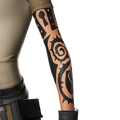
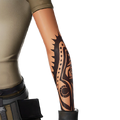
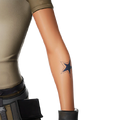
Tatoos
| Default | |
|---|---|
 | |
| Requirement | |
| Maya's Challenges |
| Psychedelic | |
|---|---|
 | |
| Requirement | |
| Maya'due south Challenges |
| Ink | |
|---|---|
 | |
| Requirement | |
| Maya'south Challenges |
| Bloom | |
|---|---|
 | |
| Requirement | |
| Maya's Challenges |
| Lion Age | |
|---|---|
 | |
| Requirement | |
| Maya's Challenges |
Sleeves
| Default | |
|---|---|
 | |
| Requirement | |
| Maya's Challenges |
| Sleeves | |
|---|---|
 | |
| Requirement | |
| Maya's Challenges |
| Tank Superlative | |
|---|---|
 | |
| Requirement | |
| Maya's Challenges |
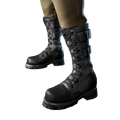
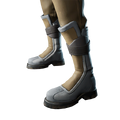
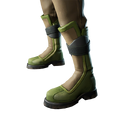
Boots
| Default | |
|---|---|
 | |
| Requirement | |
| Maya's Challenges |
| Boots 2 | |
|---|---|
 | |
| Requirement | |
| Maya's Challenges |
| Boots iii | |
|---|---|
 | |
| Requirement | |
| Maya'due south Challenges |
| Boots iv | |
|---|---|
 | |
| Requirement | |
| Maya's Challenges |
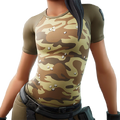
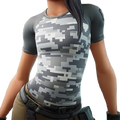
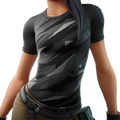
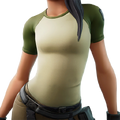
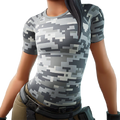
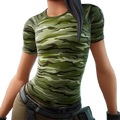
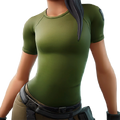
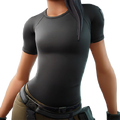
Shirt Colors
| Default | |
|---|---|
 | |
| Requirement | |
| Maya's Challenges |
| Dark-brown Camo | |
|---|---|
 | |
| Requirement | |
| Maya'south Challenges |
| Arctic Camo | |
|---|---|
 | |
| Requirement | |
| Maya'due south Challenges |
| Jungle Camo | |
|---|---|
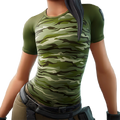 | |
| Requirement | |
| Maya'south Challenges |
| Urban Camo | |
|---|---|
 | |
| Requirement | |
| Maya'south Challenges |
| Grey | |
|---|---|
 | |
| Requirement | |
| Maya's Challenges |
| Greenish | |
|---|---|
 | |
| Requirement | |
| Maya's Challenges |
| Nighttime | |
|---|---|
 | |
| Requirement | |
| Maya's Challenges |
| Default (Full) | |
|---|---|
 | |
| Requirement | |
| Maya'south Challenges |
| Chocolate-brown Camo (Total) | |
|---|---|
 | |
| Requirement | |
| Maya's Challenges |
| Chill Camo (Total) | |
|---|---|
 | |
| Requirement | |
| Maya's Challenges |
| Jungle Camo (Full) | |
|---|---|
 | |
| Requirement | |
| Maya'southward Challenges |
| Urban Camo (Full) | |
|---|---|
 | |
| Requirement | |
| Maya's Challenges |
| Gray (Full) | |
|---|---|
 | |
| Requirement | |
| Maya's Challenges |
| Green (Full) | |
|---|---|
 | |
| Requirement | |
| Maya'south Challenges |
| Nighttime (Total) | |
|---|---|
 | |
| Requirement | |
| Maya'due south Challenges |
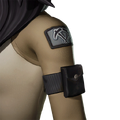
Belong
| Default | |
|---|---|
 | |
| Requirement | |
| Maya's Challenges |
| Greyness | |
|---|---|
 | |
| Requirement | |
| Maya's Challenges |
| Ammo Belt | |
|---|---|
 | |
| Requirement | |
| Maya's Challenges |
| Military machine | |
|---|---|
 | |
| Requirement | |
| Maya's Challenges |
| Blackness | |
|---|---|
 | |
| Requirement | |
| Maya's Challenges |
Helmet
| Default | |
|---|---|
 | |
| Requirement | |
| Maya's Challenges |
| Helmet | |
|---|---|
 | |
| Requirement | |
| Maya's Challenges |
| Goggles | |
|---|---|
 | |
| Requirement | |
| Maya's Challenges |
| Hat | |
|---|---|
 | |
| Requirement | |
| Maya'southward Challenges |
| Bucket | |
|---|---|
 | |
| Requirement | |
| Maya's Challenges |
| Hat - Night | |
|---|---|
 | |
| Requirement | |
| Maya's Challenges |
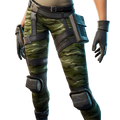
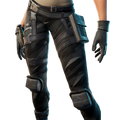
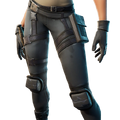
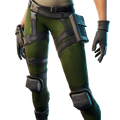
Pants Color
| Default | |
|---|---|
 | |
| Requirement | |
| Maya's Challenges |
| Dark-brown Camo | |
|---|---|
 | |
| Requirement | |
| Maya'southward Challenges |
| Arctic Camo | |
|---|---|
 | |
| Requirement | |
| Maya's Challenges |
| Jungle Camo | |
|---|---|
 | |
| Requirement | |
| Maya'due south Challenges |
| Urban Camo | |
|---|---|
 | |
| Requirement | |
| Maya'south Challenges |
| Gray | |
|---|---|
 | |
| Requirement | |
| Maya's Challenges |
| Green | |
|---|---|
 | |
| Requirement | |
| Maya'due south Challenges |
| Dark | |
|---|---|
 | |
| Requirement | |
| Maya's Challenges |
Face Paint
| Default | |
|---|---|
 | |
| Requirement | |
| Maya's Challenges |
| Brand Up | |
|---|---|
 | |
| Requirement | |
| Maya'south Challenges |
| Warpaint | |
|---|---|
 | |
| Requirement | |
| Maya's Challenges |
| Warpaint two | |
|---|---|
 | |
| Requirement | |
| Maya's Challenges |
| Clay | |
|---|---|
 | |
| Requirement | |
| Maya's Challenges |
Scarf
| Default | |
|---|---|
 | |
| Requirement | |
| Maya'southward Challenges |
| Scarf | |
|---|---|
 | |
| Requirement | |
| Maya's Challenges |
?

The ? section is a section that involves the supposed hugger-mugger Battle Pass peel, Deadpool. Every week, a couple of challenges will be given, called Deadpool's Weekly Challenges. The challenges will earn a reward based on Deadpool, consisting of sprays, a banner, a loading screen, a dorsum bling, and the Deadpool outfit.

Deadpool's alphabetic character to Epic
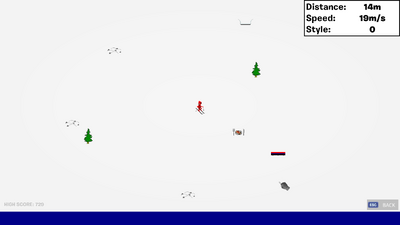
Pfreely minigame
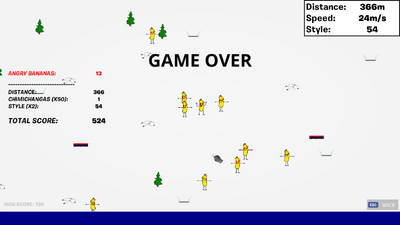
Game Over
Spy Games

The Spy Games department, originally Coming Before long until mid flavor, is a section where players tin choose a side, Ghost or Shadow, and play Functioning matches to gain intel. Each side has a list of 50 abilities that players can apply to play the matches. When intel is earned, the player earns more than tech. Each team starts with half-dozen abilities equally starter tech.
SHADOW Tech
Starter Submachine Gun Standard consequence short-range weapon Overprepared Increased starting ammo Compact Bandage Bazooka Heal yourself or teammates Gunsmith Upgrade all your weapons to a college rarity Starter Pump Shotgun Standard issue close-quarters weapon Function Fish Swim faster Rapidfire SMG High charge per unit of fire short-range weapon Shield Drip Proceeds shields over time Decoy Creats a lookalike of yourself to trick opponents Run & Gun Improved hip-fire accuracy for all weapons Submachine Gun Brusque-range weapon with increased rarity Bandage Bazooka + Bandage Bazooka that holds more charges Heavy Shotgun Shotgun with improved precision at range Pickaxe Run Run faster while holding your pickaxe Jetpack Take flight in brusque bursts Hand Cannon Slow-firing powerful pistol Decoy + Create a lookalike of yourself that has shields Pump Shotgun Close-quarters weapon with increased rarity Shield Steal Gain shields past damaging shielded opponents Rapidfire SMG + Rapidfire SMG with an increased mag size Jetpack + Jetpack that regenerates charge while non in apply Air Raid Deal increased damage while airborne for longer than one 2d Clinger An explosive that sticks to players and surfaces Heavy AR Medium-range burglarize with hard-hitting bullets Adrenaline Rush Increased sprinting speed after taking damage Clinger + Sticky explosives that you tin throw more frequently Heavy Shotgun+ Precision shotgun with increased range Trusty Dual Wield Trusty Pistol is dual-wielded and rarity is increased. Hand Cannon + Powerful pistol with kickback that propels you backwards Informant Opponents you eliminate reveal nearby opponents Kingsman Loftier tech parasol that fblocks bullets and smacks stuff Tactical Set on Burglarize Medium-range automatic meaty rifle Metal Armor Gathered metal converts to shield over time Submachine Gun Short-range weapon with increased magazine size From the Brink Deal more than impairment while at low health. Heavy AR + Hard-hit attack rifle with increased fire rate Trusty Magazine Trusty Pistol magazine size and rarity is increased. Impulse Grenade Propel yourself and others away upon detonation Resupply Eliminations give all tech ammo or charges Hasty Harvest Hit Weak Spots to temporarily increase pickaxe swing speed Tailwinds Increased glider speed Dynamite Loud explosive that destroys structures Minigun Continuous fast-firing weapon Pump Shotgun + Pump Shotgun with improved headshot damage Tactical Attack Rifle + Tactical AR with improved burn rare and headshot damage Shockwave Grenade + Impulse farther and through structures. Replaces Impulse Grenade Materials Master Increased starting materials and harvesting rate Dynamite + Dynamite that propels everyone into the air Kingsman + Kingsman that tin block more incoming harm Sharpened Stick Pickaxe damage increases with successive hits vs opponents Minigun + Minigun with faster spin-up and improved overheat chapters Low Grav Stay airborne longer Heavy Sniper + Heavy Sniper with a gamble to instantly reload Come up At Me Bro Reveal your location to opponents at all times TNTina'south Ka-Boom Bow Boom!
1 (Starter Tech) ii iii iv 5 6 7 8 9 10 11 12 thirteen 14 15 16 17 18 19 xx 21 22 23 24 25 26 27 28 29 30 31 32 33 34 35 36 37 38 39 40 41 42 43 44 45 46 47 48 49 50 ![]()


![]()

![]()

![]()

![]()

![]()
![]()
![]()

![]()
![]()
![]()
![]()
![]()
![]()

![]()
![]()
![]()

![]()
![]()
![]()
![]()

![]()
![]()
![]()

![]()
![]()

![]()
![]()

![]()

![]()
![]()

![]()
![]()


![]()
![]()
![]()
![]()
![]()
![]()
![]()
![]()

![]()
![]()
![]()

![]()
![]()

![]()
![]()

![]()
GHOST Tech
Starter Set on Rifle Standard issue medium-range weapon Sneaky Move faster while crouching Proximity Mine Explodes when an opponent is within range Therapeutic Swim Regenerate health while swimming Starter Semi-Motorcar Sniper Standard issue long-range weapon Speed Reload Reload all of your weapons faster Scoped Assault Rifle Assault Rifle with scoped visibility for increased range Battle Ready Spawn with shields practical Creepin' Paper-thin Nothing to encounter hither. Merely a moving box Double Jump Jump twice Assault Rifle Medium-range weapon with increased rarity Proximity Mine + Spawn with additional Proximity Mines Commodities Action Sniper Burglarize Single-shot sniper rifle with long-range scope Tracer Rounds Mark opponents you lot damage for a curt fourth dimension Chug Splash Applies shields to yourself and nearby teammates Suppressed SMG Quiet short-range automatic weapon Creepin' Cardboard + Creepin' Cardboard that you're in can withstand more impairment Semi-Auto Sniper Long-range weapon with increased rarity Crash Pad Country safe and bounce high Reinvigorated Instantly regain health after an elimination Scoped Assault Rifle + Scoped Assault Rifle with reduced recoil Chug Splash + Chug Splashes that provide additional shield over time Parting Gift Leave behind a Proximity Mine where you were eliminated Shield Bubble Create a bulwark that blocks bullets Tactical Shotgun Fast firing close-quarters shotgun Tanky 'Regain some lost health or shields after taking damage Shield Bubble+ Shield Chimera with low gravity inside Suppresseed SMG + Tranquillity SMG that deals increased damage with its last 5 bullets Trusty Suppressor Trusty Pistol shots are serenity Bolt Action Sniper Rifle + Sniper rifle that can reload while non beingness held Glass Cannon Deal more than damage, but receive more impairment Grappler Fling yourself toward nearby surfaces Suppressed Sniper Rifle Quiet single-shot sniper rifle with long-range scope Glider Redeploy Deploy your glider while airborne. Assault Rifle + Tranquility medium-range automatic weapon Dance Back up Emoting heals yourself and nearby teammates. Semi-Auto Sniper + Long-range weapon with increased fire charge per unit Trusty Headhunter Trusty Pistol headshots deal more than damage and rarity is increased. Copy Cat Trusty Pistol is replaced by an particular from eliminated opponents Fast Accuse Improved charge rate on all tech Stronge Resolve Reduced blanch after receiving harm Stink Bomb Creates a odour so bad that it hurts Burst Assault Burglarize Medium-range rifle that shoots in iii round bursts Tactical Shotgun + Tactical Shotgun that fires more than pellets Crash Pad + Land safe and bounciness even higher Suppressed Sniper Rifle + Suppressed Sniper Rifle with thermal vision scope Agile Aim Increased mobility while aiming down sights Stink Flop + Stink Bomb with longer-lasting smell Grappler + Grappler with increaed range. Sharpshooter Increased headshot impairment, just reduced body damage Outburst Assault Burglarize + Flare-up Assault Burglarize with increased structure damage Shield Synergy Proceeds some shields when you gain health Scoped Revolver + Scoped Revolver with improved fire charge per unit and recoil Mandatory Boogie Eliminations force yous to boogie Midas' Drum Gun The gold standard
1 (Starter Tech) ii 3 4 five vi 7 8 9 10 eleven 12 thirteen 14 15 16 17 18 19 20 21 22 23 24 25 26 27 28 29 30 31 32 33 34 35 36 37 38 39 40 41 42 43 44 45 46 47 48 49 50 ![]()
![]()

![]()

![]()
![]()
![]()

![]()

![]()
![]()
![]()
![]()

![]()
![]()
![]()
![]()
![]()
![]()
![]()

![]()
![]()

![]()
![]()
![]()

![]()
![]()
![]()

![]()

![]()
![]()
![]()


![]()
![]()

![]()
![]()


![]()
![]()
![]()

![]()
![]()
![]()

![]()
![]()
![]()
![]()

![]()
![]()

![]()

![]()
![]()
Gallery
-

Promotional Prototype for the Chapter 2 Season ii Boxing Pass.
-
Promotional Image for the Chapter 2 Season ii Battle Pass showing the GHOST Styles.
-

Promotional Epitome for the Chapter 2 Flavour ii Battle Pass showing the SHADOW Styles.
-

Promotional Image for the Chapter two Flavour 2 Boxing Laissez passer in the News Tab 1 week earlier the season ended.
| Chapter 1 Seasons | ||||||
|---|---|---|---|---|---|---|
| ||||||
| Chapter 2 Seasons | ||||||
|---|---|---|---|---|---|---|
| ||||||

Season 2 Battle Pass Skins,
Source: https://fortnite-archive.fandom.com/wiki/Battle_Pass_Chapter_2_Season_2
Posted by: riddicksomillow.blogspot.com
0 Response to "Season 2 Battle Pass Skins"
Post a Comment